Saturday, December 16, 2023

Carrot Hot Dish

Mom’s Carrot Hot Dish: A Holiday Staple

When the holidays roll around, the aromas from the kitchen tell a story of family traditions. For my family, one dish always made its way to the table: my mom’s carrot hot dish. This recipe is a perfect blend of comforting flavors and simple ingredients, making it a beloved classic that everyone looks forward to year after year.

The combination of tender carrots, creamy soup, and a cheesy, buttery crouton topping is nothing short of magical. It’s the kind of dish that brings people back for seconds (and thirds). Whether you're looking to introduce a new side dish to your holiday menu or simply craving a cozy casserole for a special meal, this recipe is sure to deliver.


What Makes This Recipe Special

The Ingredients Tell a Story

  • The use of Velveeta cheese gives it a nostalgic, creamy richness.
  • Herbed croutons add a flavorful crunch that balances the soft, savory filling.
Versatile for Any Occasion

  • While it’s a holiday favorite for our family, this dish also pairs beautifully with roast chicken or ham for any special dinner.

A Tradition Worth Keeping

  • My mom’s recipe has been passed down with care, and each time I make it, I’m reminded of the love and effort she poured into making holidays special for us.

INGREDIENTS

  • 4 cup carrots
  • 1 medium onion
  • 3 tbsp butter
  • 1 can cream of celery soup
  • 1/2 cup diced Velveeta cheese
  • 3 cup herbed flavored Croutons*
  • in 1/2 cup melted butter
  • 1/2 tsp salt & pepper

INSTRUCTIONS

  1. Cook carrots for 10 minutes in salt water.
  2. Saute onion in 3 tbsp. butter.
  3. Discard water and combine carrots and onions.
  4. Then add soup and cheese. Cover with the croutons, melted butter, salt & pepper.
  5. Bake @ 350° for 30 minutes.


* Seasoned Croutons may be used.


Tips for the Perfect Carrot Hot Dish
  • Prep Ahead: This dish can be assembled the night before and baked just before serving.
  • Crouton Swap: If you’re out of croutons, crushed Ritz crackers or a panko breadcrumb topping work as tasty substitutes.
  • Extra Veggies: Add a handful of peas or green beans for a pop of color and texture.

This carrot hot dish is more than just a side—it’s a piece of family history. I hope you enjoy making it as much as my family has, and that it becomes a cherished tradition at your table too.

Let me know if you try it, and share your own twists or memories in the comments below!

Thursday, November 16, 2023

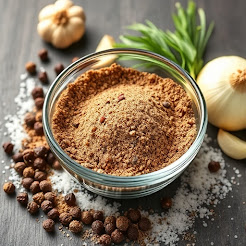
Chili Seasoning

Chili Seasoning


Ingredients

1 tbsp chili powder

1 tsp ground cumin

1/4 tsp cayenne pepper

1/4 tsp garlic powder

1/2 tsp onion powder

1 tsp salt

1/4 tsp approximately freshly ground pepper

Steps

  1. Place all of the ingredients into a bowl and whisk to combine.

Gadgets, Appliances, & Tools

  • Mason jars for storage
  • Mason jar lids
  • Label printer

Notes

  • ...

Wednesday, November 15, 2023

Italian Seasoning

Italian Seasoning


Ingredients

6 tbsp dried basil

2 tbsp dried oregano

1 tbsp dried marjoram

1 tbsp dried thyme


Steps

  1. Place all of the ingredients into a bowl and whisk to combine.


Gadgets, Appliances, & Tools

  • Mason jars for storage
  • Mason jar lids
  • Label printer

Notes

  • Great to sprinkle over pizza
  • I use this in my alfredo sauce

Tuesday, November 14, 2023

Taco Seasoning

Taco Seasoning


Ingredients

1/4 cup Chili Powder

3 tbsp Dried Minced Onion

1 tbsp Garlic Powder

2 1/2 tsp Salt

2 tsp Dried Oregano

2 tsp Ground Cumin

1 1/2 tsp Cayenne Pepper

1 tsp Ground Coriander


Steps

  1. Place all of the ingredients into a bowl and whisk to combine.

Gadgets, Appliances, & Tools

  • Mason jars for storage
  • Mason jar lids
  • Label printer

Notes

  1. Add seasoning to ground beef for Taco Tuesday

Monday, November 13, 2023

Prime Rib Rub Seasoning

Prime Rib Rub Seasoning

Cost: $
Servings: 2
Prep Time: 5 min
Cook Time: ~45 min (use a thermometer)

Prime Rib Rub takes 5 minutes to make and will be a staple in your spice cabinet! It is so fresh and flavorful you won't want your prime rib any other way.

Ingredients

3 tablespoons Kosher salt
2 tablespoons coarse ground pepper
1 tablespoon dried Italian seasoning herbs
1 tablespoons garlic powder
2 teaspoons onion powder
2 teaspoons smoked paprika or regular paprika

Steps

  1. Place all of the ingredients into a bowl and whisk to combine.

Gadgets, Appliances, & Tools

  • Mason jars for storage
  • Mason jar lids
  • Label printer

Notes

  • Rub the seasoning all over the prime rib, making sure to get the top and bottom. You can also use this seasoning on other beef, such as oven-roasted beef or hamburgers.
  • If you aren't using it right away, store it in a sealed container for up to 2 months. I use Mason jars with plastic lids. They store and stack well in my pantry.


Saturday, November 11, 2023

Pumpkin Pie Truffles

Pumpkin Pie Truffles

Taste of Holidays: Pillowy soft pumpkin pie surrounded by vanilla shell in bite-sized portions.

The essence of fall. This exquisite treat features a velvety chocolate shell embracing a rich, creamy pumpkin filling infused with cinnamon, nutmeg, and cloves. Each bite delivers a harmonious blend of autumnal flavors. Perfect for personal enjoyment or festive gatherings, our Pumpkin Pie Truffle is a celebration of the season's bounty, offering a decadent fusion of tradition and gourmet indulgence in every bite-sized delight. Savor the warmth and nostalgia of autumn with this irresistible confectionary creation.


Savings$$$$
Prep Time15 min

INGREDIENTS

  • 20 graham crackers or 300g vanilla wafers
  • 2 1/2 ounces cream cheese
  • 1/2 cup pumpkin puree
  • 1/2 teaspoon vanilla extract
  • 2 teaspoons pumpkin pie spice
  • 2 cups white chocolate or white chocolate almond bark

INSTRUCTIONS

  1. In a food processor, pulse graham crackers until fine. Place in a bowl and set aside.
  2. Into the same food processor, add your cream cheese, pumpkin puree, pumpkin pie spice, and vanilla, and mix until smooth. Add the graham cracker crumbs back in and continue mixing until incorporated. Scrape down the sides as needed. Place mixture into a bowl and refrigerate for 30 minutes.
  3. While the mixture is cold, roll it into 1-inch balls and place them on wax paper. Freeze the truffles for at least two hours or up to overnight.
  4. Melt your white chocolate and then dip truffles one at a time to evenly coat each one. Set on wax paper to harden. Dip the truffles a second time. While the truffles are still wet, sprinkle the top with a dusting of pumpkin pie spice and let the truffles harden completely.

Note, you do not need a food processor. If you don't have a food processor, add graham crackers or vanilla crackers to a bowl or zip-top bag and smash until the crackers resemble granulated sugar.


Chocolate Peanut Butter Truffles

Chocolate Peanut Butter Truffles

Heavenly Delights: Decadent Chocolate Peanut Butter Rice Krispy Truffles Recipe

Indulge your taste buds in the ultimate symphony of flavors with our Decadent Chocolate Peanut Butter Rice Krispy Truffles. These delightful bite-sized treats are a fusion of velvety chocolate, creamy peanut butter, and the classic crunch of Rice Krispies. Perfect for satisfying your sweet cravings or impressing guests at any occasion, these truffles are a heavenly combination of textures and tastes.


INGREDIENTS

Savings$$$$
Prep Time15 min
1 cup creamy no stir peanut butter
3 tablespoons salted butter, melted
1 cup powdered sugar
2 ½ cups rice krispies cereal
12 oz Semi sweet chocolate chips or chocolate melting wafers

INSTRUCTIONS

  1. Use a KitchenAid or hand mixer to combine the peanut butter and melted butter.
  2. Add the rice krispies until combined.
  3. Add the powdered sugar and mix to combine.
  4. Once it becomes too hard to mix, finish mixing it together with a rubber spatula.
  5. Line a baking sheet with parchment paper.
  6. Use a cookie scoop to drop peanut butter balls onto the baking sheet.
  7. Roll the batter into balls with your hands and place in the fridge for at least 30 minutes to chill and firm up.
  8. Melt the chocolate in the microwave until smooth.
  9. Dip the rice krispies peanut butter balls into the chocolate then place back onto the baking sheet.
  10. Chill until firm.
Store leftover peanut butter balls in an airtight container for several days, or in the freezer for several weeks.

Note, you do not need a mixer. It does make it easier.

Chocolate chips make this recipe easy and you can probably make them right now. These ingredients are most likely in your pantry. Chocolate almond bark typically gets more compliments.


Saturday, May 20, 2023

Easy French Bread


Savor the Flavor: Effortless French Bread Magic from Cheap People's Club


Embark on a culinary journey with our Easy French Bread recipe from Cheap People's Club, where we've crafted a simple yet delightful way to bring the allure of French baking into your home. Designed with budget-conscious bakers in mind, this recipe ensures maximum flavor with minimal effort, using wallet-friendly ingredients easily found in your pantry.


Ingredients:

  • 1 cup warm water ~100°
  • 2 tsp yeast
  • 1 tbsp sugar
  • 1 tsp salt
  • 1 tbsp oil
  • 2 1/2 - 3 cup flour
  • 1 egg

Instructions:

  1. Warm filtered water in microwave to 100°-105°. (A cup of water in a glass measuring cup for 45 seconds.)
  2. Add warm water, yeast, & sugar to bowl (mixer bowl if using a mixer). Let sit until foamy (about 5 minutes).
  3. Add 2 cups of flour, salt, & oil to the bowl. TIP: Make tablespoon measuring spoon sized dip in the flour to measure the oil. Better than washing the oil out of the measuring spoon :).
  4. Combine the dough:
    • Mixer Method: With the dough hook, start mixing the dough to combine. The dough will start looking "shaggy" and then start pulling ingredients off the side of the bowl.
    • By-Hand Method: Bring the ingredients together with fingertips. The dough will be very sticky at first. After some combining, it will start to resemble dough with layers or "shaggy".
  5. Knead the dough:
    • Mixer Method: After the dough has come together in a ball, knead the dough for 3-5 minutes on medium-low speed. (Kitchenaid mixer level 2.) The dough should Roll around the bowl freely and get wrapped around the dough hook. If the dough sticks to the bowl, it needs a little bit more flour.
    • By-Hand Method: Knead the dough with the heal of your palm. Flip the dough clockwise 45 degrees and then firmly press the heal of your palm into the dough. Rotate dough and repeat for 5 minutes.
  6. First Rise. After kneading the dough, drizzle a little olive oil in a bowl to cover dough. Roll dough around in bowl to cover. Cover bowl with dish towel and let sit for 1 hour.
  7. After 1 hour, punch down dough and shape for baking. Cut slits in top of the loaf with a sharp knife about 1/4" deep and 1 inch apart. This bread works well as a single loaf on a sheet pan for classic french bread or put in a greased loaf pan.
  8. Second Rise. Let dough rise for 1 hour in loaf shape of choice.
  9. Preheat oven to 375°.
  10. Bake in oven for 20 minutes. Take out of oven and check internal temperature. Bread final temperature should between 200°-205°. After 20 minutes, the bread will be closer to 190°. With a silicone brush, brush the top of the loaf with the egg.
  11. Put loaf back in the oven for 3-5 minutes, depending how far the internal temperature was below 200°-205°. Also, remember the loaf will continue to cook slightly after removing from the oven and before starting the cooling process.
  12. While warm bread with melty butter is desired by all, you shouldn't cut hot bread straight out of the oven. Let the bread rest for 10 - 15 minutes before cutting.

Note, you do not need a mixer with a dough hook to make recipe. It does make it easier and if you make bread frequently, even the most expensive mixer would pay for itself. People have been making bread for hundreds of thousands of years without a power mixer. The odds are your grandparents or great grandparents made it this way.


Budget-Friendly Ingredients for Quick Wins

Our Easy French Bread calls for basic kitchen staples available at affordable prices. Flour, water, yeast, salt, and a pinch of sugar are the heroes here, transforming into a crusty masterpiece that won't break the bank.


No-Fuss Mixing and Rising – Perfect for the Everyday Chef

Gone are the days of complex steps and costly equipment. Cheap People's Club simplifies the process, allowing you to effortlessly mix the ingredients and let the dough rise with ease. No need for special gadgets; just grab a bowl, a spoon, and let patience do the rest.


Stress-Free Shaping and Baking on a Budget

Shaping your French bread is a breeze with our step-by-step instructions, catering to the everyday chef on a budget. No need for fancy techniques; mold the dough into the classic baguette shape, pop it in the oven, and voilà – a golden-brown crust and a soft, airy interior await.


Customization on a Dime

Cheap People's Club encourages you to get creative without breaking the bank. Our Easy French Bread recipe serves as a wallet-friendly canvas for your culinary imagination. Add herbs, garlic, or a sprinkle of cheese for a personalized touch without stretching your budget.


Family-Friendly and Budget-Conscious

Gather the family for a budget-friendly baking adventure! This recipe is perfect for beginners and a fantastic way to introduce kids to the joy of homemade bread without draining your wallet. Turn it into a weekend activity, creating delicious memories together.


Bid adieu to pricey and complicated recipes and say hello to the simplicity of Cheap People's Club's Easy French Bread. Tailored for those on a budget, this recipe lets you savor the authentic taste of France without a hefty price tag. Elevate your baking game with this affordable guide and relish the satisfaction of creating a fresh, crusty baguette right in your own kitchen. Try it today and make every meal a flavorful delight with the aroma and taste of budget-friendly homemade French bread!


The Sourdough Bread Recipe That Actually Works (and Saves You Money!)

Why Bake Sourdough Bread at Home? There’s something incredibly satisfying about slicing into a crusty loaf of sourdough that you made from...